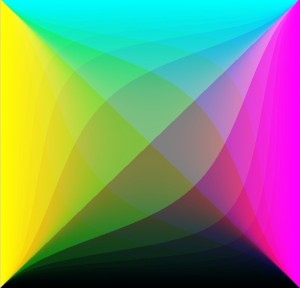
 When you go to replenish your ink cartridges, you don’t come home with a Red/Green/Blue gizmo. You come home with a Cyan/Magenta/Yellow/Black multi-pack whose cost is about the same as your printer. (It’s the razor and blades business model.) Your computer (input device) works in RGB; your printer (output device) works in CMYK. The RGB color vectors are zero to 255, the CMYK vectors are zero to 100. But it’s not that simple (more on this at the end). It’s like converting Fahrenheit to Celsius and only being able to use integer degrees. The -40° equivalent commonality point for colors is zero. The image is a representation of the CMYK color space.
A Code Project page referenced from Wikipedia gives the generic algorithm:
- Black = minimum(1-Red,1-Green,1-Blue)
- Cyan = (1-Red-Black)/(1-Black)
- Magenta = (1-Green-Black)/(1-Black)
- Yellow = (1-Blue-Black)/(1-Black)
Red, Blue, and Green are normalized to 0.0 to 1.0 (divide by 255) and the output then is scaled (multiply by 100). This is the XL2CMYK() function.
Function XL2CMYK(xlclr As Long) As Variant

   Dim Red As Double, Green As Double, Blue As Double

   Dim Cyan As Double, Magenta As Double, Yellow As Double, Black As Double
Red = XL2RED(xlclr) / 255 'normalizing
Green = XL2GRN(xlclr) / 255
Blue = XL2BLU(xlclr) / 255
Black = Application.WorksheetFunction.Min(1 - Red, 1 - Green, 1 - Blue)
Cyan = Round(100 * (1 - Red - Black) / (1 - Black), 0) 'scaling then rounding
Magenta = Round(100 * (1 - Green - Black) / (1 - Black), 0)
Yellow = Round(100 * (1 - Blue - Black) / (1 - Black), 0)
Black = Round(100 * Black, 0)
XL2CMYK = Array(Cyan, Magenta, Yellow, Black)
End Function
With the RGB shown on the linked page {171,215,170}–an apple green, the xlclr is 11196331. The CMYK out is {20,0,21,16}, irritatingly different than what is shown in the Code Project page’s image, but what in fact does happen when you run the downloadable file.
The flip function CMYK2XL() is this:
Function CMYK2XL(Rng As Range) As Long

   Dim Cyan As Double, Magenta As Double, Yellow As Double, Black As Double

   Dim Red As Double, Green As Double, Blue As Double
Cyan = Rng.Cells(1, 1) / 100 'normalizing
Magenta = Rng.Cells(1, 2) / 100
Yellow = Rng.Cells(1, 3) / 100
Black = Rng.Cells(1, 4) / 100
Red = (1 - Cyan) * (1 - Black)
Green = (1 - Magenta) * (1 - Black)
Blue = (1 - Yellow) * (1 - Black)
Red = Round(255 * Red, 0) 'scaling then rounding
Green = Round(255 * Green, 0)
Blue = Round(255 * Blue, 0)
CMYK2XL = RGB(Red, Green, Blue)
End Function
When input {20,0,21,16} the output is 11130539. Tilt. It’s because of the rounding and aligning to integers. This is what it looks like:
| 11196331⟹ | ⟸11130539 |
 Close enough for now. I can’t see a difference, but these eyes have some miles on them, and are behind plastic to boot. But there are differences. Wikimedia Commons gets almost the last word.
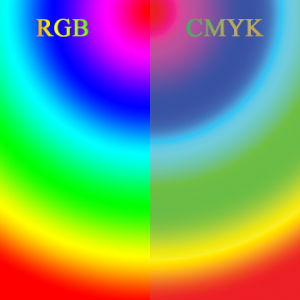
A comparison of RGB and CMYK color spaces. … If you were to print the image on a CMYK device (an offset press or maybe even a ink jet printer) the two sides would likely look much more similar, since the combination of cyan, yellow, magenta and black cannot reproduce the range (gamut) of color that a computer monitor displays. This is a constant issue for those who work in print production. Clients produce bright and colorful images on their computers and are disappointed to see them look muted in print. (An exception is photo processing. In photo processing, like snapshots or 8×10 glossies, most of the RGB gamut is reproduced.)
The code above is a device-independent solution to a device-dependent problem. Your printer will vary. But passing your work through it and back will give you an idea of what the printed product will look like, before it’s printed.
Next up, Part 3: XL2HEX() and HEX2XL()
…mrt
©¿©¬