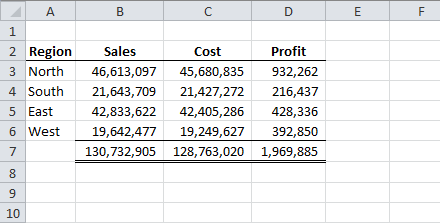
Here’s a report for a high volume, low margin product. Because the profit is so much smaller than sales and costs, column D is narrower than columns B and C.
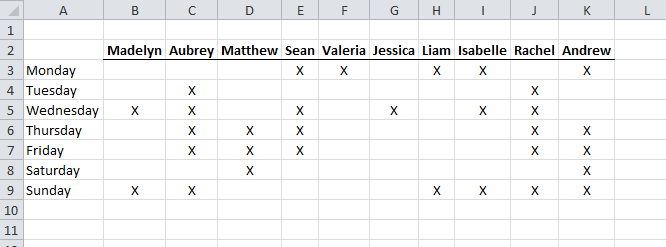
Another example is the following table with names across the top. When the column widths are set to autofit, they all become different widths. Of course that simply won’t do.
Drag Multiple Columns
The first technique, and likely the most common, is to select all the columns and change the width of one of them. That will change the width of all of them. In the below figure, I select the entire columns B through K. It appears that column D is the largest so I select the column divider between D and E and drag it a few pixels to the right, then drag it back.
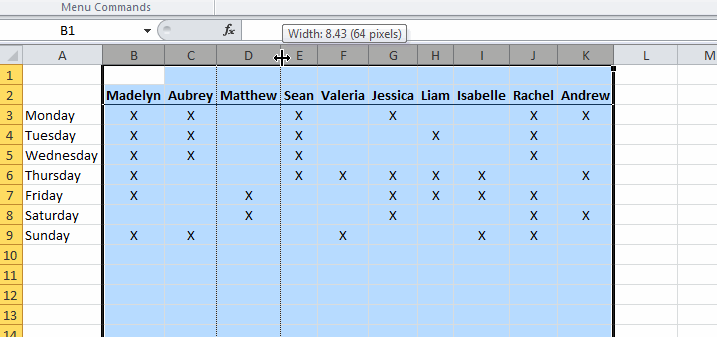
This changes all the selected columns to the width set for column D.

Well, that’s all I have to say about setting column widths. Of course I’m kidding. Let’s look at some keyboard only methods.
Format Column Widths
Select any cell in column D and click the Column Widths button on Home – Cells – Format (Alt + H + O + W). That will tell you the width of column D.

Make a note of the width and dismiss the dialog box (Esc). Now select cells in every column you want to change. For example, I selected B2:K2. It doesn’t have to be row 2. In fact, it could be multiple rows. All that matters is that every column that you want to change is included in the selection. Because the column widths aren’t the same, the Column Width dialog is empty.
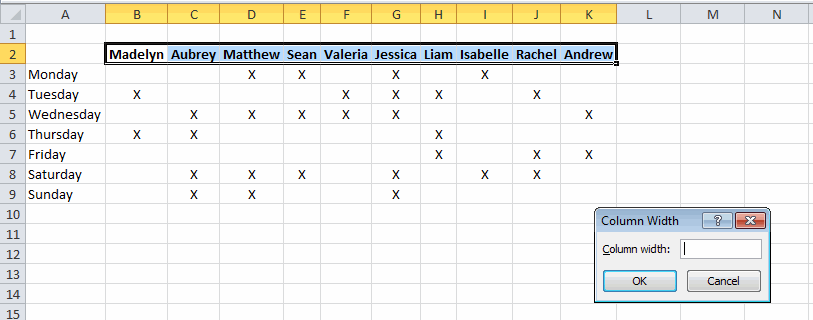
I can type 8.43 in that box (the width of column D that I looked up earlier) and all the columns will be set to that width.
Paste Special
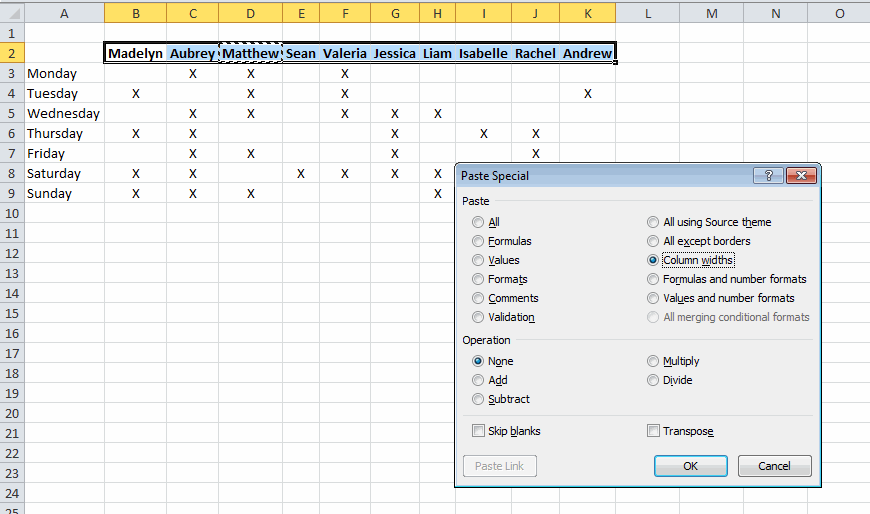
To use this method, select D2 and copy it (Ctrl+C). Next, select B2:K2 and choose Paste Special from the Ribbon (Alt + H + V + S). Choose the Column widths radio button (Alt+w) and click OK (Enter).
Build Your Own
You knew this was coming, didn’t you? Didn’t you? I wrote a macro and assigned it to Ctrl+Shift+W.
|
1 2 3 4 5 6 7 8 9 10 11 12 13 14 15 16 17 18 19 20 21 22 23 24 25 26 27 28 |
Public Sub MatchColumnWidths() Dim lMax As Double Dim rCell As Range gclsAppEvents.AddLog "^+w", "MatchColumnWidths" If TypeName(Selection) = "Range" Then If Selection.Cells.Count > 1 Then 'if the first cell is active, set all columns to the biggest column If ActiveCell.Address = Selection.Cells(1).Address Then For Each rCell In Selection.Rows(1).Cells If rCell.ColumnWidth > lMax Then lMax = rCell.ColumnWidth Next rCell For Each rCell In Selection.Rows(1).Cells rCell.EntireColumn.ColumnWidth = lMax Next rCell 'if the user selected a particular cell (not the first one), set 'all columns to the selected column Else For Each rCell In Selection.Rows(1).Cells rCell.EntireColumn.ColumnWidth = ActiveCell.ColumnWidth Next rCell End If End If End If End Sub |
Now I can select a range, press Ctrl+Shift+W, and my column widths are set. From the examples above, I select B2:K2, press Ctrl+Shift+W, and all the columns match the largest column (D). If you simply select a range, it will make all the columns the same size as the largest column. If you want to choose a different column, first select the range, then use the Tab key to move to the column you want to mimic.
If you want to mimic the first column, and it’s not the largest, you have to select more than one row and press Enter to move to first the column in the second row.
For the formatting column widths manual method, if you click OK to dismiss the Column Width dialog box, you can then press F4 after selecting all the columns to set all columns to the width of column D.
Way long ago, before you could protect a sheet and specify that users could resize columns, I made a little form to let users change columns widths. It had a textbox for entering the width and a slider with an accelerator key for really fast sizing :-). I loved that form, and was kind of sad when the next version of Office made it irrelevant. The reason it’s relevant here is that it also had a “Size to Largest” button.
The one change I’d make to your code is to have it cycle only through the cells in one row of the selection. Otherwise a user could select entire columns (maybe already selected from doing the mass column resize) and then run it. I just did that and, five minutes later, wishing I’d saved my work.
Ooh, sorry about that. Fixed to replace
with
No problem. I went into it with my eyes open :-). It’s a rare day that I don’t crash Excel, and it’s mostly just data connections anyway.
Thanks, great post! There is often a need to adjust many columns at once when e.g. working with large reporting forms that I often encounter.
/Mats
This might be an equivalent:
Of course it should be:
Augmenting an ancient thread. I want to focus on autofit which is imperfect.
As to the VBA route here, I add a fudge factor, a multiplicand of perhaps 1.1 (use whatever works for you, and it can evolve over time), to autofit results. Autofit and WYSIWYG are more perilous than most realize when you release something to others. Cells can “look okay to you” but not to workbook recipients’. The worst problem seems to be different printers and possibly drivers and fonts. It’s disturbing how frequently I’ve encountered this. Autofit (or widening as discussed above) often just isn’t quite enough.
I have a 3 step method of checking for “#####” (which by the way itself _occasionally_ survives autofit): 1. Run a VBA sweep of every cell examining
If Left(.Text, 1) = “#”
2. Run same thing but in “page view” instead of normal (xlPageBreakPreview, not xlNormalView).
(By the way both of those can have false negatives! It shows # on the screen and .Text is not! That’s a topic for another day.)
3. Visually print preview.
All 3 of them can and sometimes do differ in terms of what is considered “##”-ified, or text truncated. But EVEN when all 3 tests “pass”, I have had a recipient of the workbook complain of some # signs and text truncation. Ergo, the fudge factor that I’m recommending for some of you.
BTW some may defend the text issue with wrap, but that can also wreck nice visual symmetry.
——–
I love the site. I love the amazing commenters(and Dick), many of the names legendary. I love this one topic page particularly, because real men pay strong attention to keyboard methods :) In my extensive observation the fastest, and most accurate, and most productive Excel users use keyboards almost entirely and often only reach for the mouse (in Excel) in very limited cases. (Which of course is why Mother MS keeps incompetently damaging it – /rant off)