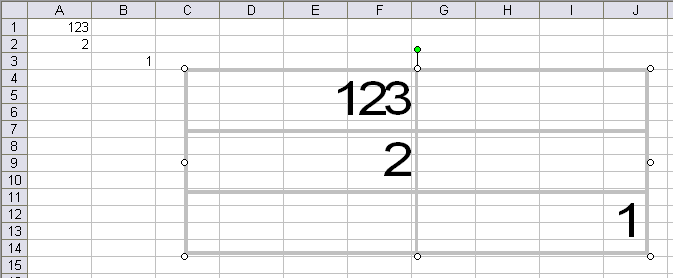
Frequent commenter Alex always has some interesting ideas, and this one didn’t disappoint. If you copy a range, then hold down the Shift key, you will see a Paste Picture Link item under the Edit menu. With this, you can paste a picture onto your worksheet that is linked back to the copied range.
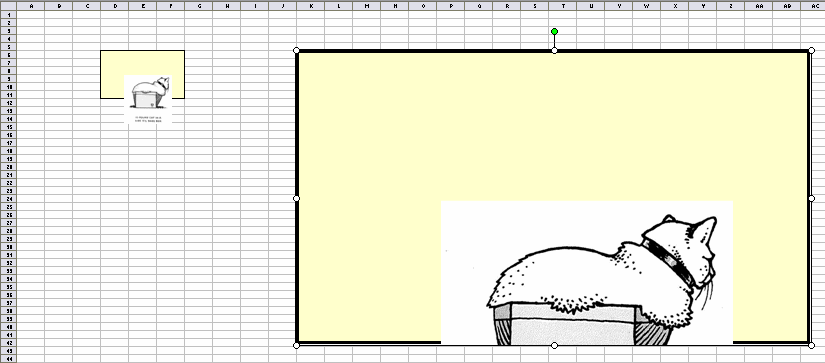
One interesting benefit to this feature is that you can magnify a range.

You can even drag a picture into the range and magnify it.

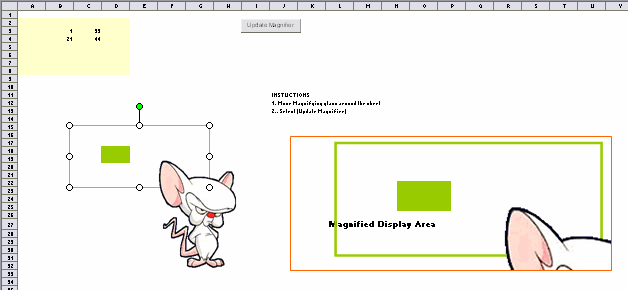
Then Alex made a workbook where he can drag a shape around, press a button, and magnify the area to which he dragged it.

He has to press a button because the Shape object doesn’t have any decent events to speak of. After reviewing Alex’s workbook, I set out to crash Excel. If a shape, such as a picture, can be shown simply by dragging it into a range, then any shape could be shown in that manner. Hey, the linking object is a shape. I figured if I drag the linking object into the range that is linked, then Excel will spiral into an eternal shape-within-a-shape calculation and crash. No such luck.

Excel survived. Now what I’d like to do is make a magnifying glass that can be drug around and magnify the range directly underneath it. Here are the problems I see:
Picture objects (they’re deprecated, so you won’t see them in the object browser) have a Formula property so they can be linked to a range, but they can’t be made round like a proper magnifying glass.
Picture objects don’t support automation events. That means I can’t trap a move event to recajigger the range to which it is linked.
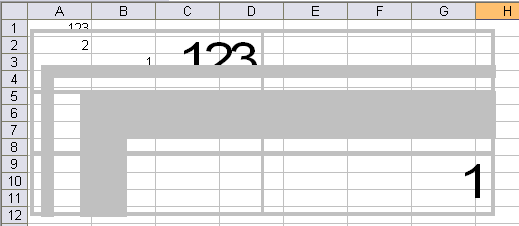
Even if I could set the range to be below the shape, I can’t stop the shape from appearing in its own representation of the linked range.
To answer your next question: No, I don’t have any use for this. I just thought it would be neat and I’m sure Andy Pope will use some combination of a scatter chart and the BESSELJ function to do it that will blow me away.
This is cool stuff. It’s like the Camera tool, without having to hunt for the button to drag onto a toolbar (or god forbid, the qat). I’ve used it a fair amount actually.
“they’re deprecated, so you won’t see them in the object browser” – so right click anywhere in the object browser, and choose Show Hidden Members.
This is useful when setting up dashboard style reports where you want to combine data from several different areas from various sheets onto one page and allows rotating of selected contents etc
There’s no use for it? You have to be kidding. Look at this..
http://www.westnet.net.au/balson/ModellingExcel/VisualModelling.shtml
You can use a single picture to show a number of charts/tables from different sheets, without any code
The best I could come up with was a microscope approach, so the subject moves rather than the lens.
I added two scrollbars to the right and bottom of the magnifying picture and added event code to them in order to adjust the position the most recent shape over the cells being magnified.
This was fun…
Sub Macro1()
ActiveSheet.Shapes(“Picture 1?).Select
For x = 1 To 360
Selection.ShapeRange.IncrementRotation x
Application.ScreenUpdating = True
For y = 1 To 100000
Next y
Next x
End Sub
Dick wrote “Excel survived. Now what I’d like to do is make a magnifying glass that can be drug around and magnify the range directly underneath it”
I’ve been using this (essentially, the camera tool) for several years now (oops! decades would be more appropriate {grin}) and recently started experimenting with Windows Accessibility aid, the Magnifier. This is available with both XP and Vista and magnifies a portion of the screen around the current location of the mouse. With a little practice, one can get very comfortable in using it to magnify a portion of the visible screen.
The ability to magnify a portion of the screen is very useful during presentations, typically, using PowerPoint. For example, I could have a chart covering a period of several years. I’d like to show the entire chart and then “zoom in” on a particular period. Or, I might show an entire news clipping and then want to focus on a particular paragraph or two. In the past it meant prepping the presentation in advance to first show the entire picture, then cut out the portion of interest, resize it larger, and show it next. And, it is still static in the sense that I have to determine up front which portion I will magnify.
But, with the Magnifier, I just have to activate it, position it appropriately, and move the mouse around.
But, why restrict oneself to a PowerPoint slide show? This is a OS capability! So, I can complete an interactive simulation in class, download the results from the web in XML, analyze the downloaded data in Excel, and show the results immediately. Since this is real time I don’t have the luxury of prep time.
Enter the Magnifier. One can now show a Excel worksheet on the screen (something that is essentially unreadable from more than a few feet away) and just move the mouse to magnify a portion of the spreadsheet.
As an aside, those who criticize technology such as PowerPoint for dumbing down presentations should examine themselves and their own understanding…or, more appropriately, lack of understanding…of technology. Use modern tools creatively — and, yes, it takes a lot of commitment on the part of the instructor to see what will and will not work with regular students, executive students, or regular executives — and one can truly liven up presentations.
Hello Experienced Excellers,
I have copied the two colummns from a bank statement and they represent the dates. I cannot change them to another format. Could anyone help in any way so that I can process them?
Thanks
3110661106
6110671106
7110671106
7110671106
7110671106
7110671106
7110671106
91106101106
211106211106
1120641206
4120641206
7120671206
7120681206
8120681206
8120681206
>and magnifies a portion of the screen around the current location of the mouse
Such facilities are also built-in with some mice, the MS Comfort Optical Mouse has an extra button on it; when clicked it toggles magnification, the size of the magnified area (rectangular) can be adjusted.
mathsmagician:
There may be a more elegant way, but this works for me.
=DATE(“20?&RIGHT(A1,2),MID(RIGHT(A1,4),1,2),DAY(LEFT(A1,1+LEN(A1)-5)))
mathsmagician:
If you copy the formula from this blog straight into Excel, be sure to re-type the quotes you see in the formula.
Cheers Mike Alexander,
Yes, it really works.
It worked almost immediately. I sussed out what you have done, especially what you have for the day portion of the date. It is really very clever as your solution determines either 1st or 11th or 31, 2nd or 12th or 22nd, 3rd or 13th or 23rd, 4th or 14th, or 24th and so on.
I have tried to sort it for a long time and gave up.
Once again thank you with my best wishes from London UK
I am currently using Excel 2000, and can not get this to work as stated above. Paste picture link is not listed on Shift+RMouse click.
I just get paste special…, and then paste link in a submenu (picture is not listed as an option for the link format). So I assume the paste picture link is available only in Excel 2003 or greater. Am I correct?
I looked at the visual modelling example posted by dermot and the concept works in Excel 2000. Now I would like to see if a paste link can be done in a picture box pre-created so as to get the same effect.
I can copy, then select a pre-existing picture box, but the shift+rmouse key does not give the paste special…, just paste.
If I select just paste, and interesting thing happens, I get a new picture box with the selected cells, which I can magnify & move around. But it’s not a link! Changing the underlying cells has no effect and it’s of questionable use. Any suggestions on an alternative approach?
Followup, you can paste multiple images as links to an alternate file such as powerpoint or word, but they are not interactive back to the underlying data without vba code.
Steve:
Use the camera instead.
To get to the camera tool, click on Tools -> Customize
Then in the activated dialog box, select Tools in the left list box.
Find “Camera” in the right list box then drag and drop the icon to your toolbars up top.
To create a linked picture:
Select the range you need, then click the camera tool, then click anywhere on your spreadsheet to place the linked picture.
Steve,
You can do as mike suggests, or ise [Shift][Edit] (on the menu bar, not right-click) to get [Copy Picture] and [Paste Picture].
Tim from Adelaide downunder. have been playing with this linked ranges as discussed at site “Dermot” provided. I would like to explore the possibility of a way to use this linked image to secure formulas and raw data from end users so they only use the image of the results. Can’t seem to find a way to use name ranges accross remote workbooks? anyone have any ideas.
I use the picture tool and a wonderful piece of freeware called IrfanView to export really high quality GIFs from Excel.
Option Explicit
‘these two constants need to be personalized
‘ensure that your default printer is set to the largest paper size possible (e.g. A2)
Const sIrfanExe As String = “C:Program FilesIrfanViewi_view32.exe”
Const sImageDirectory As String = “z:”
Dim Rng As Range
Dim dMagnifier As Double
Sub CallCopyRangeToPicture()
dMagnifier = InputBox(“Enter magnification factor”, “GIF Magnification”, 1)
If Selection.Cells.Count 1 And Selection.Areas.Count = 1 Then
Set Rng = Selection
ElseIf ActiveSheet.PageSetup.PrintArea “” Then
Set Rng = Range(ActiveSheet.PageSetup.PrintArea)
Else
Exit Sub
End If
CopyRangeToPicture Rng, dMagnifier
End Sub
Sub CopyRangeToPicture(Rng, dMagnifier)
Dim Pct As Picture
Dim wksTemp As Worksheet
Dim wkbTemp As Workbook
Dim sFName As String
Dim sCommand As String
Application.ScreenUpdating = False
sFName = sImageDirectory & ActiveSheet.Name
Set wkbTemp = Workbooks.Add
Set wksTemp = ActiveSheet
wksTemp.PageSetup.PaperSize = Rng.Parent.PageSetup.PaperSize
wksTemp.PageSetup.Orientation = Rng.Parent.PageSetup.Orientation
Rng.Copy
Set Pct = wksTemp.Pictures.Add(Left:=1, Top:=1, Width:=Rng.Width, Height:=Rng.Height)
Application.CutCopyMode = False
With Pct
.Formula = Rng.Address(True, True, , True)
.Name = “magnifier”
.Height = Pct.Height * dMagnifier
.Width = Pct.Width * dMagnifier
.ShapeRange.Line.Visible = msoFalse
.ShapeRange.Fill.Visible = msoTrue
.ShapeRange.Fill.Solid
.ShapeRange.Fill.ForeColor.SchemeColor = 9
.ShapeRange.Fill.Transparency = 0#
.CopyPicture Appearance:=xlPrinter, Format:=xlPicture
End With
wkbTemp.Close False
If Dir(sFName & “.gif”) “” Then Kill sFName & “.gif”
‘use IrfanView Command line syntax
sCommand = sIrfanExe & ” /clippaste /convert=” & sFName & “.gif”
Application.StatusBar = “Calling IrfanView to save the file ” & sFName & “.gif”
Shell sCommand, vbNormalFocus
Application.StatusBar = False
End Sub
Alex J, thank you.
I missed that nuance, yes working fine in E2000, will have to clean my glasses next time I read instructions.